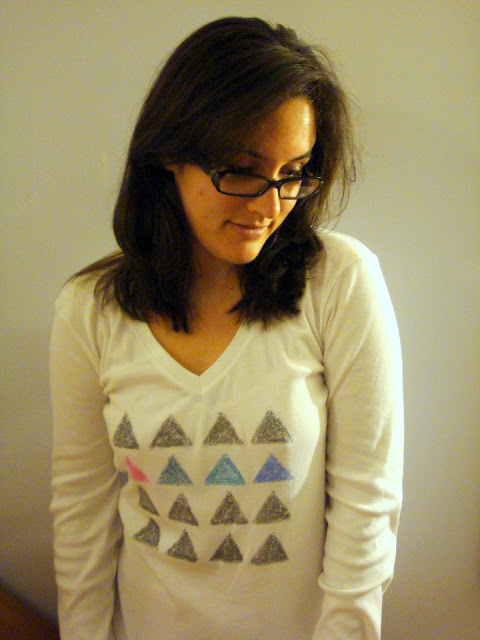
I couldn't leave that white shirt hanging. I just couldn't.
So when it came to decorating, i turned to my pins. Pinterest is one of those addicting sites where you can spend hours ooo-ing and aww-ing over photography ideas, quick recipes and easy decorating tips. The problem is, once I pin, I forget, so I have to do a re-cap every once in a while to make sure that I'm actually DOING some of these projects.
 |
| alphamom.com |
This one? Crayons, sand paper and an iron. Of course, now we're out of sandpaper and my crayons are broken, but who was using those anyway?

I found this tutorial, and although it's a craft primarily for little kids (which I will totally do), I used it because I don't have freezer paper. Or fabric paint. which are the much-loved and many-tutorial-ed ways to decorate shirts.
I measured (whoa, seriously?) where I wanted to put my graphic on my shirt- not too high and not too low. This was made a little more difficult by the fact I had a plunging V-neck.
I chose the colors I wanted to match a scarf I have and started coloring. You're going to use A LOT of the crayon. And there will be little pieces of wax on parts of the sandpaper you don't want. But that's all part of the effect, so come to terms with it now. This will not be a smooth and clean print.
Once I had finished coloring- which took much longer than anticipated!- I arranged the sandpaper on the shirt, arranged the shirt on the ironing board and covered the to-be-ironed space with paper towels to avoid burning. Hold for 20 seconds as the wax melts and transfers to the shirt.
Pull up a little -carefully!- to see if you have the amount of transfer you want. There will still be some on the paper, but most should be on the shirt.
I pulled it all off, grinned like a fool, then threw it in the dryer for 20 minutes to "set" the wax. This was a little nerve-wracking as some people said that the wax melted off (maybe they were using different crayons? The wrong dryer setting?) at this stage. Luckily, this didn't happen and I was left with a rockin' shirt.
This would be something fun to do at a party- for kids, for bachelorettes, for baby showers?! Happy ironing!


LOVE this. I can't wait to try it!
ReplyDeleteWoah! This is so cool (and easy peasy---my kinda craft!). Love it : ]
ReplyDelete