Showing posts with label Decor. Show all posts

Wednesday, September 11, 2013

Dilemma Solved

Ask and ye shall receive.

A while ago I posted my decorating dilemma: how to hang my gallery wall in our new bedroom. After a few nights of rearranging and some very well-timed Pinterest pins (thanks, Jenny!), we slapped all those suckers on the wall!

No frames were harmed in the process, though our pride might be bruised.

I'm more of a "hang it then fix it later" type of gal, but this drives Mr. E batty. So to compromise I traced all of our frames onto packing paper and taped them to the wall so we could move them around as we pleased. No holes, no spackle, less mess.
The arrangement we decided to go with
Then, when you want to hang, add a little dab of toothpaste to the back of the frame where the nail should go, level and press against the wall. You get a dab of paste right where you need to hammer the nail with no extra holes.
That little blue dot is toothpaste
After a while I got a little toothpaste happy- where I was putting toothpaste willy-nilly on frames that actually had hangers...
But they're all finally up and frames aren't littering the floor anymore, so we're all good. Phew.
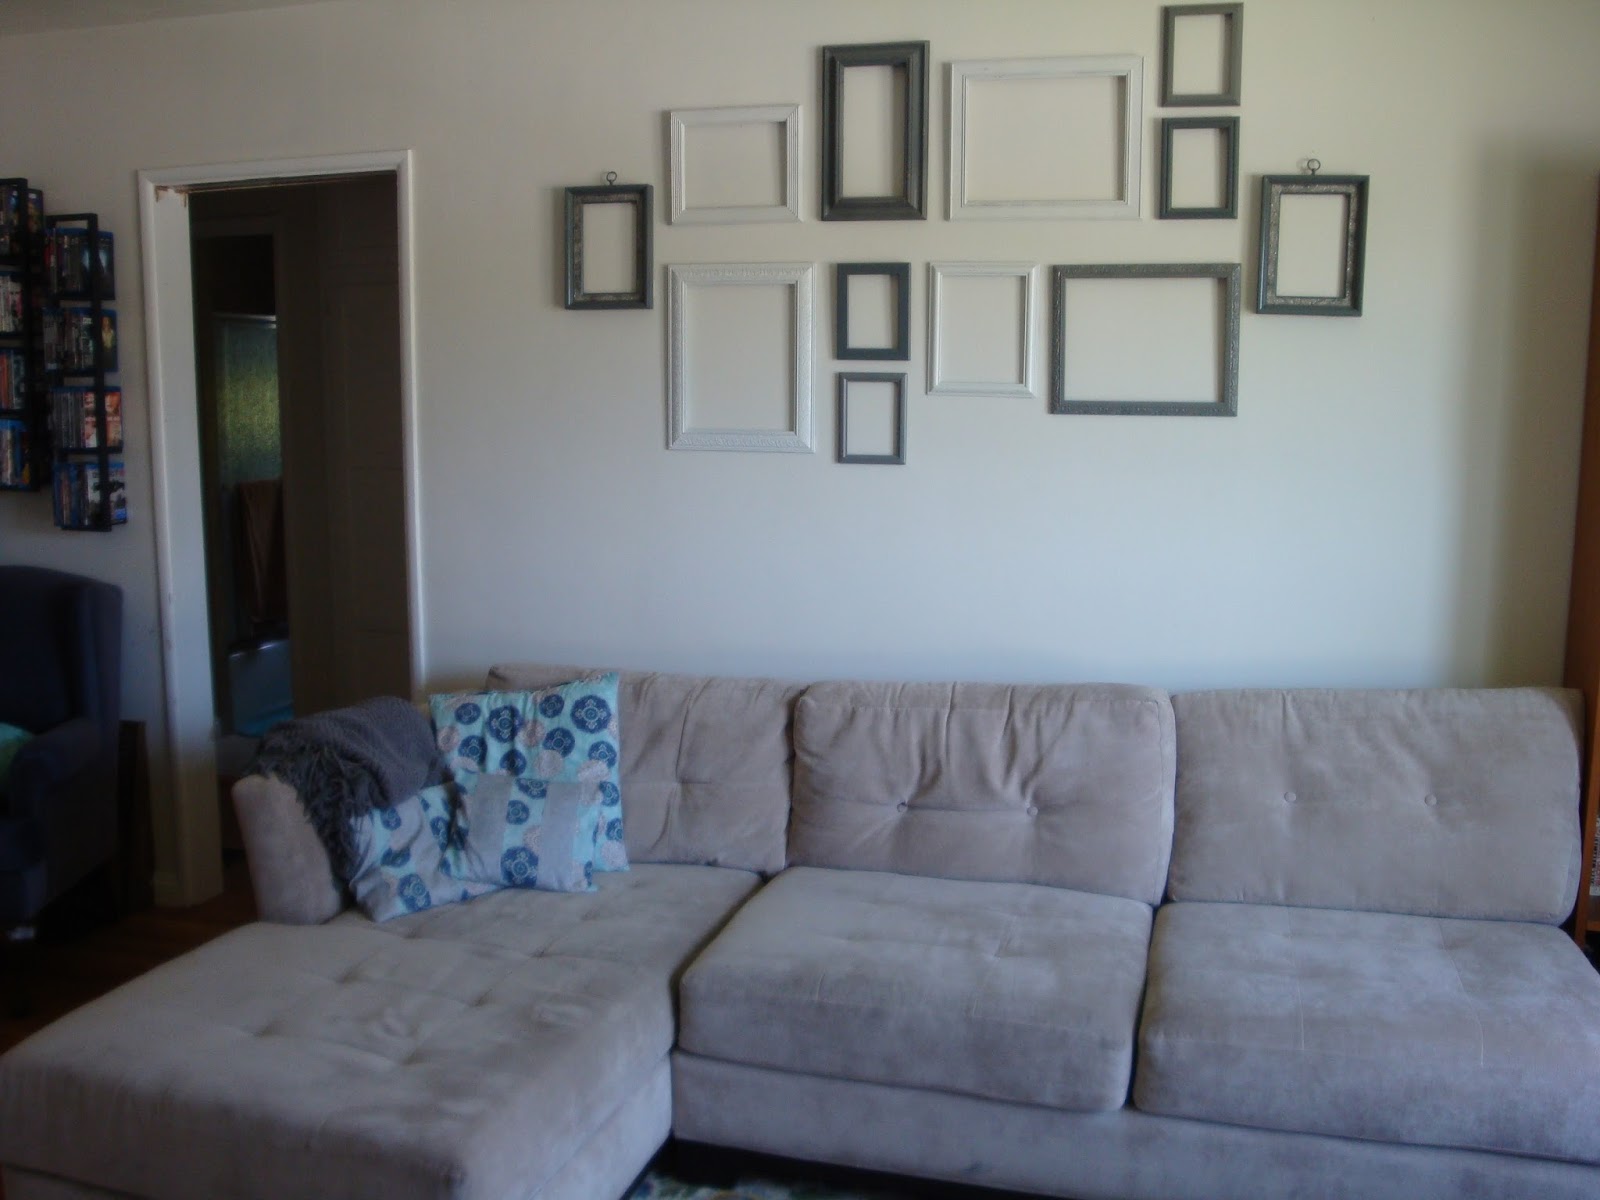
It's all about utilizing your space wisely in such a small apartment, so the opposite wall looks a little something like this...
Now if only it wasn't so freaking hot.

Saturday, August 17, 2013

Decorating Dilemma

I'm reaching the end of my rope but, sadly, NOT the end of my frames. We have two huge empty walls in the bedroom and so many frames and pictures and art pieces I don't know what to put up and what to store.

I really liked the frames I had above the couch in the last house- hollow gray and white frames that graced our the altar at our wedding. It's just that sort of modern touch with sentimental value that I'm crazy about, but we have so many frames to choose from I am a little overwhelmed.
In an effort not to create a shotgun effect on the wall, I used the packing paper we had left over from moving to trace the frames and added the color in the middle- so I could eyeball my placements.

These are the two displays I have so far, but I'm open to suggestions! What do you think?
A little long on the wall and Mr. E wasn't crazy about the line.
Shorter on the wall and a little more compact, but the two sides mesh better.

Wednesday, June 19, 2013

DIY Jewelry Hanger

Leave it to me to start a project to hang on the wall two months before I move. In my defense it had been bugging me for two years, so the fact that I did something about it trumps the hassle of taking it down again. I think. 

How did I turn the top of a door frame into a jewelry hanger? Well, a little like this. 
I'm a big fan of using what's around the house to get my projects done- especially for decor. Last fall, when I realized we didn't have any Thanksgiving/Halloween decorations, I turned to Goodwill books and recycled glass bottles. No Easter decorations? I cut up paint chips (free) and tied them together with string. As much as I love decorating, I really don't have any budget to do so.
Last year we had to knock out some pieces from a door frame in order to move a couch into the inner room of our rental. This house is sort of circular, centered around a room with access to an outside garden room that has seen better days. We've christened it the "office" and only lately have we really come to love the potential here- we house the computer, the sewing machine, our two comfiest chairs and assorted geeky knick-knacks. For a while we thought the sofa would be perfect, but after we realized that gas smell we were inhaling came from the couch, we banished it outside. Where it is still super comfy.
Case in point: kid approved!
We were left with two pieces of processed wood from the door frame- I guess these were sliding doors at one time, so they hid the unsightly track that used to be there. I had them lying around for the better part of the year, absolutely convinced I could do something with them and I'm glad that I kept them (now).

I measured and marked how long I wanted them, then had my handy Mr. E saw them into pieces. I spent the better part of an evening making my last piece of sandpaper stretch enough to sand the flaking white paint off, round the corners and smooth the sides. Anything to not make another trip to the store.

I painted them white with craft paint (this will be in the bathroom at some point, so I'm not too worried about brush strokes) and measured out holes for all of the hooks- remembering at the last minute that the first and last hole is for the screw in the wall. Nice planning, Brie.

Mr. E charged the drill (an all day affair) and eye-balled how deep he wanted the hole for the hooks. Since the wood was pretty thin we didn't want to split it, or go all the way through. To help, Mr. E taped the drill bit so he knew how far down to drill. Worked like a charm! 
We twisted the hooks in (left over from a Christmas project I didn't get to this year) and screwed those bad boys in the wall!
I really like the way they look! I originally wanted to use a tie-rack, but the one we have is occupied and I didn't want to spend $10/each for three new ones. I think they could have been spaced a little better- leaving my long necklaces to hang- but this DIY Jewelry Hanger is exactly the simple solution I've been looking for. Now I can see (and use) my necklaces/bracelets more often. Right?

Monday, May 13, 2013

Thrifty

I love a good thrift store find- in fact, many of my furniture pieces are from thrift stores! I'm drawn to the originality of the furniture there. Need a king size rattan bed? Check. Giant dresser in shocking purple? Check. There's so much life to these things that a little spray paint, elbow grease and a lot of love will bring out!

Case in point: our entertainment console. Mr. E wheeled that baby off the street. It fit the TV I brought with me from college as well as the gleaming hunk of metal Mr. E drools over. Also known as our new TV. We store our video games here, and display some of the things we've picked up on our travels. It also (semi) works for storage. Ideally I'd like to stain it a little darker, but we've stayed our hand since it might not fit when we move. 

We're also crazy about chairs from the Habitat for Humanity ReStore. I was drooling over a comfy wingback when Mr. E spied this one. Faded blue, good condition- it had my name written all over it. 

Then we found these hospital chairs. They're not terribly attractive to look at with that awful fabric, but these are SO. COMFY. Someday I'll have enough time/money/skills to make slip-covers. Or re-upholster. But until then, they don't smell and that's good enough for me.

So when my lab partner confesses his love of thrifting, count on me to suggest a little lunch-break trip! I haven't gone too crazy, considering we're moving and April was the month for FINISHING my projects, not attaining new ones. 

But I just couldn't put Abraham Lincoln down. Look at this face! Does that say stern disapproval or what?! This is actually a two-material-ed cologne bottle (with cologne still), but every blog I follow has a bust or two somewhere. Apparently busts are in. So I took him home, cleaned him off and spray painted him a monotonous soft gray! Ugh, those cheek bones. Jealous...
Of course, it's hard to stop there. Especially when you have rows and rows of fabric/pants/skirts/shirts just waiting to be re-fashioned! Since my little pants-to-shorts event, I picked up more pants (for myself and Mr. E). My pants worked out perfect- they're black corduroy (as pants? shudder) with a really cute waistband. Couple hours on those bad boys and they're shorts too!

Mr. E's were not so easy. I grabbed two pair (8 bucks each, thankyouthriftstores) and while the first pair fit fairly well (we've relegated them to "set pants") the second pair had...a lot of room. 
A LOT of room...below the fly.
 So that's how gangsters do it... 

Here I am, thinking I've GOT this: while Mr. E was on set, I set to work. I felt pretty proud of myself too! Nice straight seams, sewed the crotch together again, yadda yadda yadda. And then Mr. E tried them on and I realized I cut almost ALL of the crotch out. 
He looked over at me with such a pained expression and said, "Baby, you've made me an Abercrombie model."

Oh, well.

My most recent thrift find? Hidden among the pottery and porcelain was this gem: We'll call him Georges. And I love him. Because, you know, I don't have enough stuff on my walls...and while downsizing to move it's almost always acceptable to upsize with cute ceramic cows, right? Right??

Monday, April 29, 2013

Why Do I Do It?

Why do I craft?
Why do I sew? Why do I paint? Why do I decorate?

Because I know full well that when we have kids I will NOT HAVE TIME. And this scares me, a little bit. It's the apprehensive fear. The slow, creeping stalk of inevitability. I will have kids and they will consume my very existence. I can't wait to immerse myself in little toes and wet kisses and bath-time giggles, but I'm also terrified that they will take every ounce of me. Of who I am, of what I want and how I do the things I love to do. Is this silly? Sure. Ideas of "who I am" and "what I want" will most assuredly shift. 

These things may change, but the apprehension still remains.

I have a love/hate relationship with kids. Sound dramatic? In eighth grade I wrote a paper about raising kids, but instead of referring to them as "he" or "she" I thought I would be incredibly clever and call them "it". Because I would never have them, therefore I wouldn't even deign to call them by a pronoun. In high school I briefly entertained the idea of having children- in a theoretical, far-away-futuristic sort of way. It wasn't tangible, I didn't worry about it and I certainly didn't think about it in any real time frame. Then I babysat four hellions next door (for VERY good money) and re-evaluated. Kids were much further away than I initially thought.
I think some of my ambivalence towards tiny tots comes from the advice of my mother- one of the strongest and smartest women I know. She raised me much younger than other mothers. At a time when girls her age were taking high school exit exams, she was battling morning sickness, overcoming the fear and prejudice against teen mothers and endeavoring to give me the best start she could. She did it because she had to, because she wanted to, because she's amazing. But she told me she would never wish that struggle upon me because she worked so hard to alleviate any short-comings I may have faced due to her decisions. So I was raised with the firm belief that kids should come later. Plan your life. Live your life. Enjoy what you have and then add kids, because, while not easy it will likely be easier. So kids were never something I immediately looked forward to.

Marrying Mr. E didn't change my outlook, but suddenly I was surrounded by kids. Nieces, nephews, cousins. Well-behaved, whiny, independent, feisty, quiet, all of them adorable. You marry the family, not just the man. I inherited 12+ kids in my life, all under 12. I can barely remember when my OWN siblings were that age, much less as babies. Children became a shockingly close and intimate thought. Would my children look like this? Behave like this? Will they be shy or outspoken? Will they cry or be clingy? I was thinking of my own kids (all unborn) as quickly-becoming-realities. They were real. They were thought-provoking. And on some glacially inching level, they were coming.
"Five years" we told everyone. We want time to enjoy each other's company. We want time to spend with each other, blissfully alone and together after four years of dating "long-distance". We want to connect and come together in ways that only those selfish lovebirds can. Five years. The more we thought about it, five years became....five years again. And again.

The times we softened, holding a newborn, snuggling with toddlers, listening to "I can write my name"s and "I can count to 100"s. Then I'd think about the pregnancies I'd witnessed and envision (as only a never-pregnant woman can) the pains of labor and shudder and think "Not yet. I'm not ready. We're not ready."
But it's there. It's always there. It's like a weight hanging over me, a slight pressure on the back of my mind. Work now, before you have kids. Go out now, before children. Have single friends and parties and breakables at knee level before sticky fingers and lovely coos and crying tired eyes.

So I create, to alleviate that pressure. I sew, because it takes my mind off of it. I paint because I still have the creative capacity (and the energy) to do so. I read for the sheer pleasure of turning pages. This is my time for me, without expectations, without anticipation, without lovely little distractions. I am not a mother, but I need time to myself to grow, to learn, to experience precisely because I will be a mother. But more than that, because I want to use that time to find myself, all by myself, after the hustle and the bustle. I want to be a better version of ME. 

In all honesty, I create because I work at an incredibly left-brain job, I graduated from a college with a reputation for being stuffy and research-y and for a long time I felt very at-odds with my "old-fashioned" creativity. How many microbiology majors crochet and dream of picking up knitting needles? How many mathematicians would rather spend afternoons painting sweet nothings for their spouses? What clinical scientists take weekends to make shirts and pajamas and duvets? 

I had (erm, still have) a very hard time allowing myself to be both of these things: the scientist and the artist. I felt self-conscious that one would ruin the other- like I couldn't really be a scientist if I read chick-lit or romance novels and I couldn't very well like learning about microorganisms when I'm trying to learn the ukelele, now could I? 

But I can. Because that's me. All of this is me. I am intelligent and studied enough to discuss growth stages of bacteria, I can troubleshoot a medical device reprocessor but I can also bake my little heart out and I enjoy craft projects with kids. I am mercurial, multi-faceted and adaptable. 

I like to think that my creativity now will pay off in the long run. That all of my blog-following and Pinterest-inspired endeavors will pass down to my kids. Not only that, I hope I instill a sense of wonder and curiosity in my babes-to-be. I want them to ask why and what for, to figure it out because they can, because they want to. I want them to love painting and scissors and reading out loud but also looking through microscopes, and learning about tiny creatures in our ecosystem, just like their mom. So I craft to stay relevant. I craft to release my worries. I craft to enjoy time to myself. I craft for my kids, who, someday, will enjoy every minute of it.

Link Up! Titus Tuesday, Not Just a Housewife

Monday, April 1, 2013

Insert Egg Pun Here (Pun Intended)

I find myself lagging in posting my Pinterest projects. Sure, I make lots of recipes, but I'm also continually impressed with other bloggers' arts and crafts. I might not have kids, but I like to decorate my house too! This may be influenced by my sister-in-law who keeps her decorations for ALL holidays on strict schedule, but her house is always dressed to the nines!

We made a quick run into Home Depot for paint chips (contemplated wearing a disguise so they wouldn't recognize me) and PVC piping. Nothing like His&Hers projects. I grabbed a bunch of pastel colors from the Behr collection because the stripes between the colors are reminiscent of Easter eggs. And Peeps.

At home I sketched a quick egg shape for the kids and set about tracing two eggs on each paint chip. Some of the eggs had a few letters on them from the paint name, but they were hardly noticeable and we weren't going for perfection. There was a slight hiccup when I realized my nieces weren't cutting on the lines, but creating half-dollar size eggs, but they had made so many by that time we just made a whole garland of petite eggs too!
One little helper with the finished project. Used some plain twine to thread through hole-punched tops; just knotted and alternated colors. I love the effect! Definitely will work on my own at home! 

Wednesday, March 27, 2013

A Little Coat of Paint

We went a little spray paint happy last weekend. Here are a few of our new updates.
The kitchen organizer. What was once a dark red now greets you with a cheery smile every time I walk into the kitchen. In my dream house my kitchen will be bright and airy with pops of happy yellow appliances and dishtowels. This is our first step. Well, technically our third or fourth after my Kitchenaid (Thanks, SallyMom) and my cutting boards (Thanks, Mr. E).
I find I want to be in the kitchen more often (MORE often?) just to look at this thing. I love it.
Before...in a messy and Valentine-ed-Up office
Then we spray painted our cork boards. This poor room is so neglected. Only a few months before we have to leave and I've finally hit my stride with it. We cleaned, organized and de-cluttered our little hearts out and have finally found a balance to the desk-top, the chair arrangement and the creative corners. While I had initially planned on spray painting both corkboards black (or white), I never got around to it and I'm so glad I waited. The pop of blue was the perfect touch to tie in the other blue tones from around the room. They look so much more cohesive.
After...cleaned up and blue!
A spray-painting party just don't stop, and even Mr. E had to get in on the action. Here's a little sneak peek into our Halloween costume. Yeah, we're starting that early. Let's be honest, though, Mr. E will find any excuse to use this bad boy. When not being flaunted or carried around lovingly (my husband is a giant 3 year old), the shield decorates the office too! Look at those matching blues...
 Lastly, as a little side project, I found this tray in our garage, courtesy of our landlady. While some people would appreciate the original art (hand painted), I was drooling over the shape. 

The hand-joined corners were calling my name and with a little elbow grease and some sandpaper, I was able to sand down the brush strokes and spray painted this a metallic silver. You can still see some of the original flowers, but now it looks like etched metal without all the hassle of cleaning silver.
I can't leave well-enough alone, so I painted a giant spring green stripe down the middle too as sort of an homage to our new duvet cover. I would like to paint something a little more personal on top of that, but I can't decide:
1) Words? A poem, our wedding vows, a song? 2) Symbols? a spoon, a monogram, a fluer de lis? 3) Something geeky? The chemical structure of dopamine? Seratonin? A soundwave of Mr. E's voice?
Decisions, decisions. Ultimately, my goal is to re-paint the nightstands too. Any suggestions?

Thursday, March 21, 2013

My Stars!


I made this fix a few weeks ago because I couldn't stand looking at the plain-jane colors against our wall anymore. Story of my life.

You'll recall I had big plans for these free frames. I loved the idea of a favorite quote spelled in stickers over a bright colored painting, but the end was just too small, too plain and too gray. It wasn't quite the pop I wanted and I wasn't crazy about the colors underneath anyways. The great thing about painting is how versatile it is. Thank goodness, too.

I decided to reverse the effect- I loved the gray, but for the spot I wanted it, the painting was already above a mostly gray photo mat, so it wasn't visual enough. I was idly searching through color schemes for our bedroom to coordinate with my new duvet cover (I am still impressed by myself with this!) when I came across some beautiful shots of space. You know the ones I'm talking about- the swirling colors, the winking stars, the breathless feeling you get when you realize how infinitesimal we really are.
design-seeds.com
Frankly, a lot of the beauty to these pictures is how imperfect the miasma is (space clouds? galaxies?). There's a lot of color and a lot swirls and nothing is symmetrical or repeatable. Kind of like a little reminder for my life. At least, that's what helps me sleep at night.

So I got a little creative with my available colors and swirled my little heart out. The back is sort of a navy/black/teal combo and I alternated stars in white, yellow and bright pink. I love the result so much, I almost didn't want to paint over it!
But paint I did. I was still partial to the original quote, but those little stickers weren't cutting it. If there's one thing I do well, it's copy. I can free-hand art and fonts with a passion. Plus, the font I wanted to use was $45. And I still can't figure out how to download a font onto my computer. So I quickly sketched out the quote and arranged it in a few ways for Mr. E to approve. I actually liked the four lined version myself, but he chose the two liner. We're so democratic. 


  VS.


The gray is actually silver fabric paint- it has a little bit of a sheen to it without being glittery. No problem with a different medium, either. Overall, I LOVE the result. This is exactly the sort of visual impact I wanted and the bright pops of pink and green are exactly the modern colors I wanted in our gray/blue bedroom. Mr. E approved.